Integrations: Acquisio
This article will guide you through the configuration of Acquisio within AVANSER Customer Portal as well as steps within Acquisio configuration. Before jumping to the article, you can check our short video.
Step 1: ACQUISIO - Enable external data source
Acquisio is a Bid Management Platform i.e. just like Google Ads. Acquisio allows clients to configure their paid search and display ads in more flexible way:
- more campaigns can be run simultaneously,
- better bulk editing,
- better control for larger clients or larger agencies which have a lot of sub clients.
AVANSER as part of the integration, adds the call conversion (count) through paid search into the platform.
To match the call conversions with individual accounts/campaigns within Acquisio, you need to enable external data source ID called “trkid” within your Acquisio account/s.
This is an unique id string which gets appended to the click URL once a user clicks through from an ad. This unique ID helps identify which campaign/ad-group/keyword generated the call conversion once it’s pushed back into Acquisio.

Steps to enable “trkid” within Acquisio:
Client Account >> Data Sources >> External data source >> trkid

Default set-up, which should be used is for full account level; although this can be changed to only keyword level or campaign level.

If a historical push is done for only select numbers in an Acquisio Campaign (configured in the Route), then it will overwrite any existing data in that campaign. This means call data for numbers that are already pushed will be wiped.
Step 2: Creating an Integration Account at AVANSER Customer Portal
Navigate to Customer Portal. Select the cog wheel in the left bar and click Integrations -> Acquisio
Follow the steps described for each parameter required:
- Host - Provide Acquisio FTP Host, unless you have a customized Acquisio hostname you should use dataintegration.clientcampaigns.com
- Username - Acquisio FTP Username, please contact your Acquisio Account Manager for more information.
- Password - Acquisio FTP Password, please contact your Acquisio Account Manager for more information.
- Call Details - Enables or Disables the push of Detailed Call Data Conversion, if disabled only summaries will be uploaded to Acquisio.
- Status - Enables or Disables the Offline Conversion. If not active, calls received by the numbers associated with this account will not trigger an Offline Conversion.
Click the UPDATE AND CONTINUE button. Hooray you have created a new Integration Account and you can now report to it.
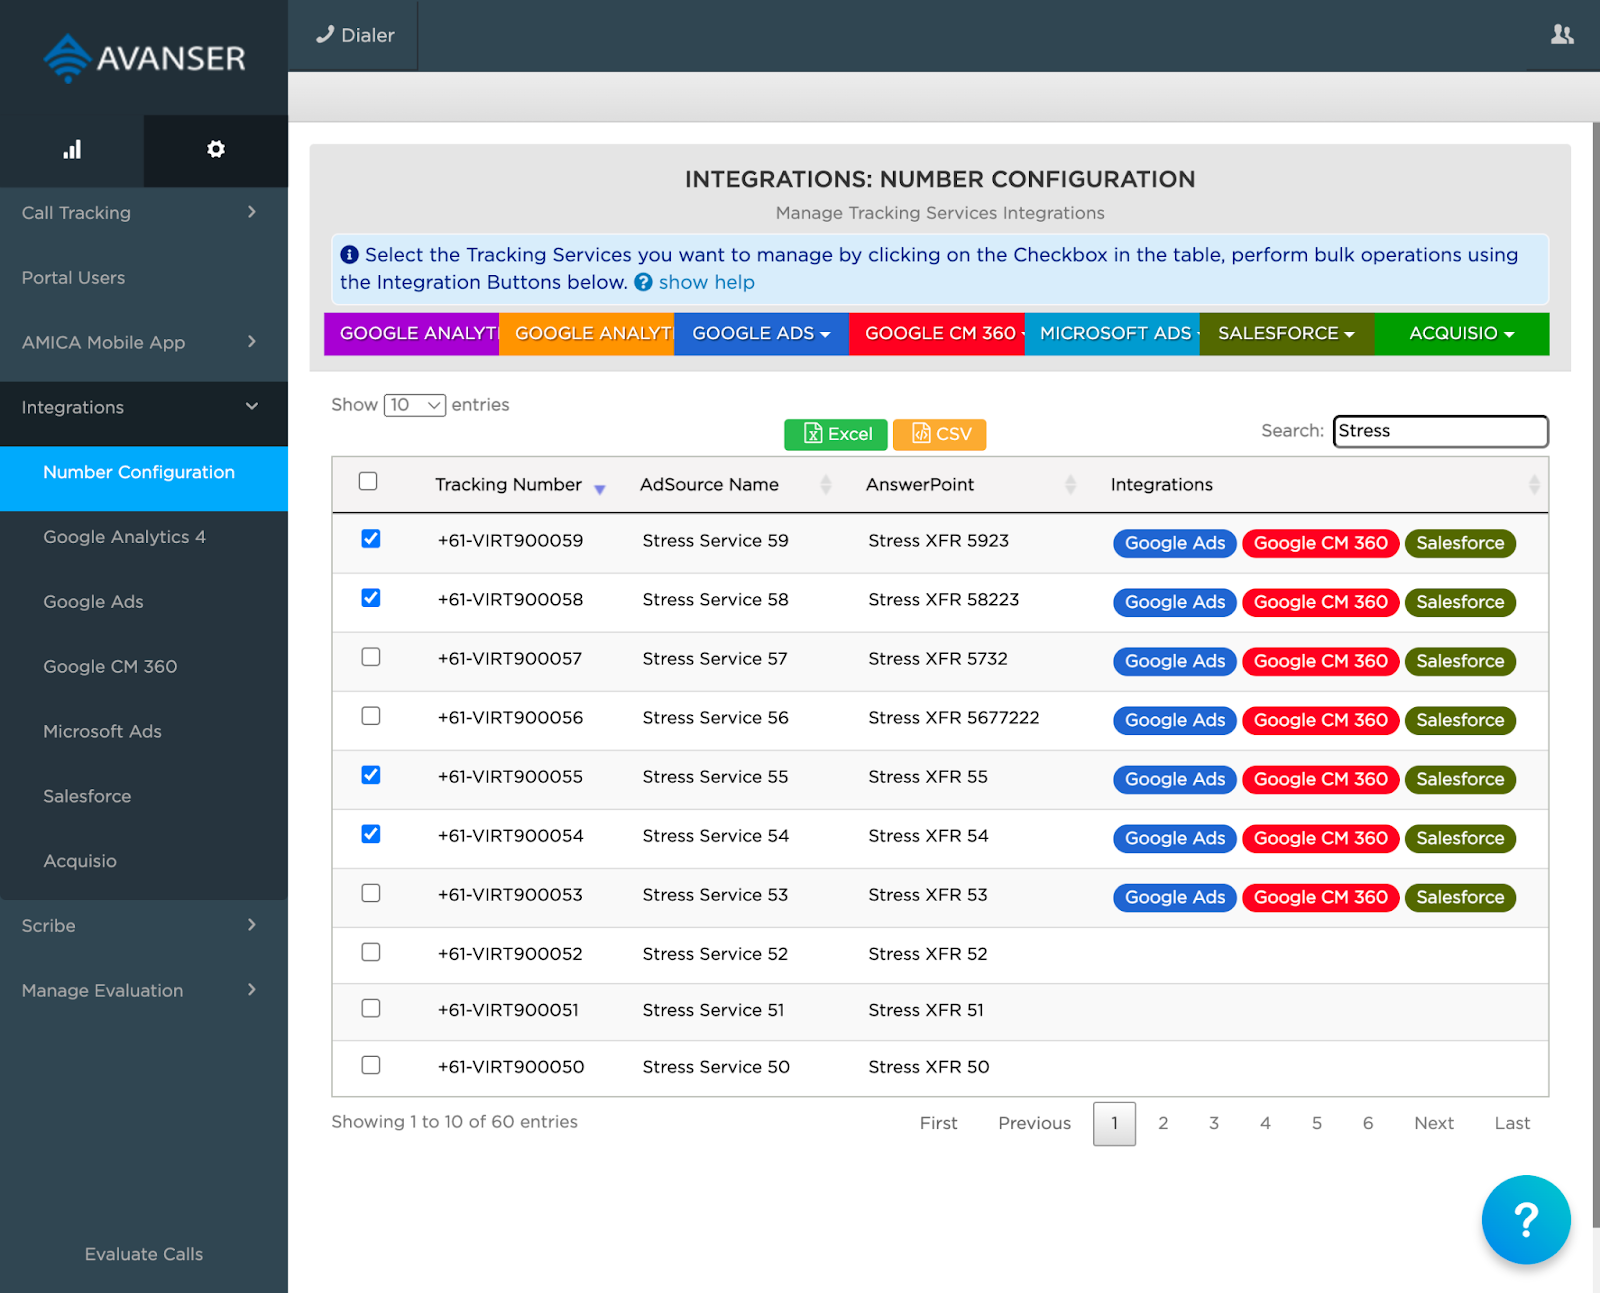
Step 3: Configuring Numbers for an Integration
Next steps can be performed from the Integration Page or from the Number Configuration View.
Navigate to the Number Configuration view by clicking on the "Number Configuration" submenu under the "Integrations" menu.
1. Select the numbers you want to configure
Use the search bar and tick the check box to select the numbers you want to perform a bulk operation.

Other bulk operations you can perform include:
- Enabling and Disabling integration configurations.
- Deleting integration configurations.
2. Click on the desired integration button
All integrations are designed to offer a familiar interface and they all provide the same functionalities.
3. Click on the "Configure" menu option
Provide name of the Account you want to use for the integration.
Account specifies what Account the Call Data for the Tracking Number should be assigned to in your Acquisio Dashboard. Must match exactly the name in the Acquisio Dashboard.
Note specifies additional information to be push with each reported Call Data associated with your Acquisio Account and the Tracking Number. By default it is name "AVANSER Call".
Finally, Status enables or disables Offline Conversions for the Number. If not active calls received by the number will not trigger an event push.
Click the Update and Continue button to save the changes to the services. The integration is now configured.
You can make some test calls or wait for calls to land on your numbers. Call events will be sent to the reporting platform automatically.
Step 4: Verifying Your Integration Configurations
- In the Account Page
- Verify the Account is ACTIVE.
- Validate the Integration Account Options.
- In the Numbers Page
- Verify the Numbers are associated with the right account.
- Verify the Number configuration is ACTIVE.
- Perform test calls.
- In order to test integrations like Microsoft Ads, Google Ads, Google CM360 or Acquisio you need to click on a legitimate Ad to expect the data in the platform.
- Search for your Ad or refer to your Ad platform of choice on how to click through the add.
- When the Ad takes you to the Website, check the number and verify that the configuration and the number displayed match.
- Call the number displayed on the website.
- Check that events are received at least once on the 3rd Reporting Platform.
Troubleshooting
- Calls not going into Acquisio: Please check that the account name configured for the FTP Host within the AVANSER system is same as in the Acquisio system – this needs to be an exact match since the Acquisio platform is punctuation, spelling, space and case sensitive. Once the issue if fixed, all calls which weren’t pushed through earlier can be re-pushed through an historical drop.

Steps on historical push of data to Acquisio: AVANSER Legacy Portal >> Integration>> Acquisio Historical >> Click on the green button “Create Acquisio Historical Push Request >> Select date range for push i.e. date from and date to (please confirm this with client) + select an adsource for the re-push + drop results email (choose your email to get the results). The system will do the historical push and notify the requestor once completed via email.
- Calls not matching with the campaigns within Acquisio: Call conversions are matched within the Acquisio account through the “trkid” within the click URL. Check the landing page and conversion page (within Session DNR Log in Portal) for the “trkid”. If present, the calls should match, if not you should enable it. Once enabled, all calls henceforth will be matched within the account.
If the trkid is enabled, but still not appended in the click URL, this have to be consulted with Acquisio - this could be due to Acquisio account misconfiguration.
NOTE: Historical push will NOT help in this case since the old URLs will still not have the trkid and hence will not be matched within the Acquisio account.
Related Articles
Integrations: Salesforce
This article will guide you through the configuration of Salesforce in the AVANSER Customer Portal. In order to use Salesforce reporting, you'll have to configure the app first. Follow its dedicated Knowledge Base articles available at: Salesforce ...Integrations: Google Ads
This article will guide you through the configuration of Google Ads. In order to use Google Ads reporting, you'll have to configure Google Ads Dashboard to collect the Conversions sent by AVANSER. Follow its dedicated Knowledge Base article available ...Integrations: Number Configuration
Number configuration has to be configured in AVANSER Customer Portal. Each tracking number can be configured for various integrations including Universal Analytics, Google Analytics 4, Microsoft Ads. In order to access the Integrations, click on the ...Integrations: Microsoft Ads
AVANSER integration is fully compatible with Microsoft Ads and all of our services will continue to work without any issue. Microsoft Ads uses the "msclkid" parameter to identify visits. AVANSER Dynamic Numbers engine stores this information for ...Integrations: Webhooks
Overview Webhook integrations allow call data to be push to other web servers, allowing integrations with any service that can accept data via a web request. Webhooks are used widely across CRM and data processing platforms, allowing the AVANSER call ...