Integrations: Salesforce
This article will guide you through the configuration of Salesforce in the AVANSER Customer Portal.
In order to use Salesforce reporting, you'll have to configure the app first. Follow its dedicated Knowledge Base articles available at:
You can check how to configure your numbers following the simple video below.
Step 1: Creating an Integration Account
Navigate to Customer Portal. Select the cog wheel in the left bar and click Integrations > Salesforce
Follow the steps described for each parameter required:
- Route Name - Identifies the name associated with the account you are creating, will be used as a reference in the interface. Eg. "Salesforce Main".
- Host - If you have a customized host name for Salesforce CRM, please specify the host here. If not, leave empty.
- Username - Salesforce User, the user setup here must have CRUD access to AVANSER's Custom Objects and Settings setup by AVANSER's Salesforce App.

Additionally make sure that the user has a AVANSER's Salesforce App License assigned. You can find more information about this in Salesforce's Help
- Password - Salesforce User's Password.
- Security Token - This must be the Salesforce Security Token.
Security Token is generated when you change Salesforce's User's Password. You can find more information about this in Salesforce's Help
- Create Leads - You can chose, whether the app should create leads if an existing record with a matching phone number cannot be found.
If set to Yes a Lead will be created if the Caller's Number is not matched to any Account stored in Salesforce CRM.

Important Notice
Salesforce Integration will push all your calls to a newly created Account. If you don't want to create a Lead for each call you ever received with AVANSER, enable the integration with the Create Leads option set to No. Once your data is processed and uploaded to Salesforce you can edit the integration and enable Create Leads if required.
- Push Period - Call Data will be pushed to Salesforce at regular interval. Depending on purchased Salesforce CRM Edition, API Calls AVANSER performs to your Salesforce CRM use your API Quota.

Please Note
Before selecting Push Period please contact your Salesforce Administrator and ensure that you we can send API calls as often as specified by the Push Period parameter.
- Status - Enables or Disables the Call Push. If not active, calls received by the numbers associated with this account will not trigger a push.
Click on Update And Continue and proceed to the next section - you have created a new Integration Account and you can now report to it.
Step 2: Configuring Numbers for an Integration
Next steps can be performed from the Integration Page or from the Number Configuration View.
1. Select the numbers you want to configure
Navigate to the Number Configuration view by clicking on the "Number Configuration" submenu under the "Integrations" menu.
Use the search bar and tick the check box to select the numbers you want to perform a bulk operation.
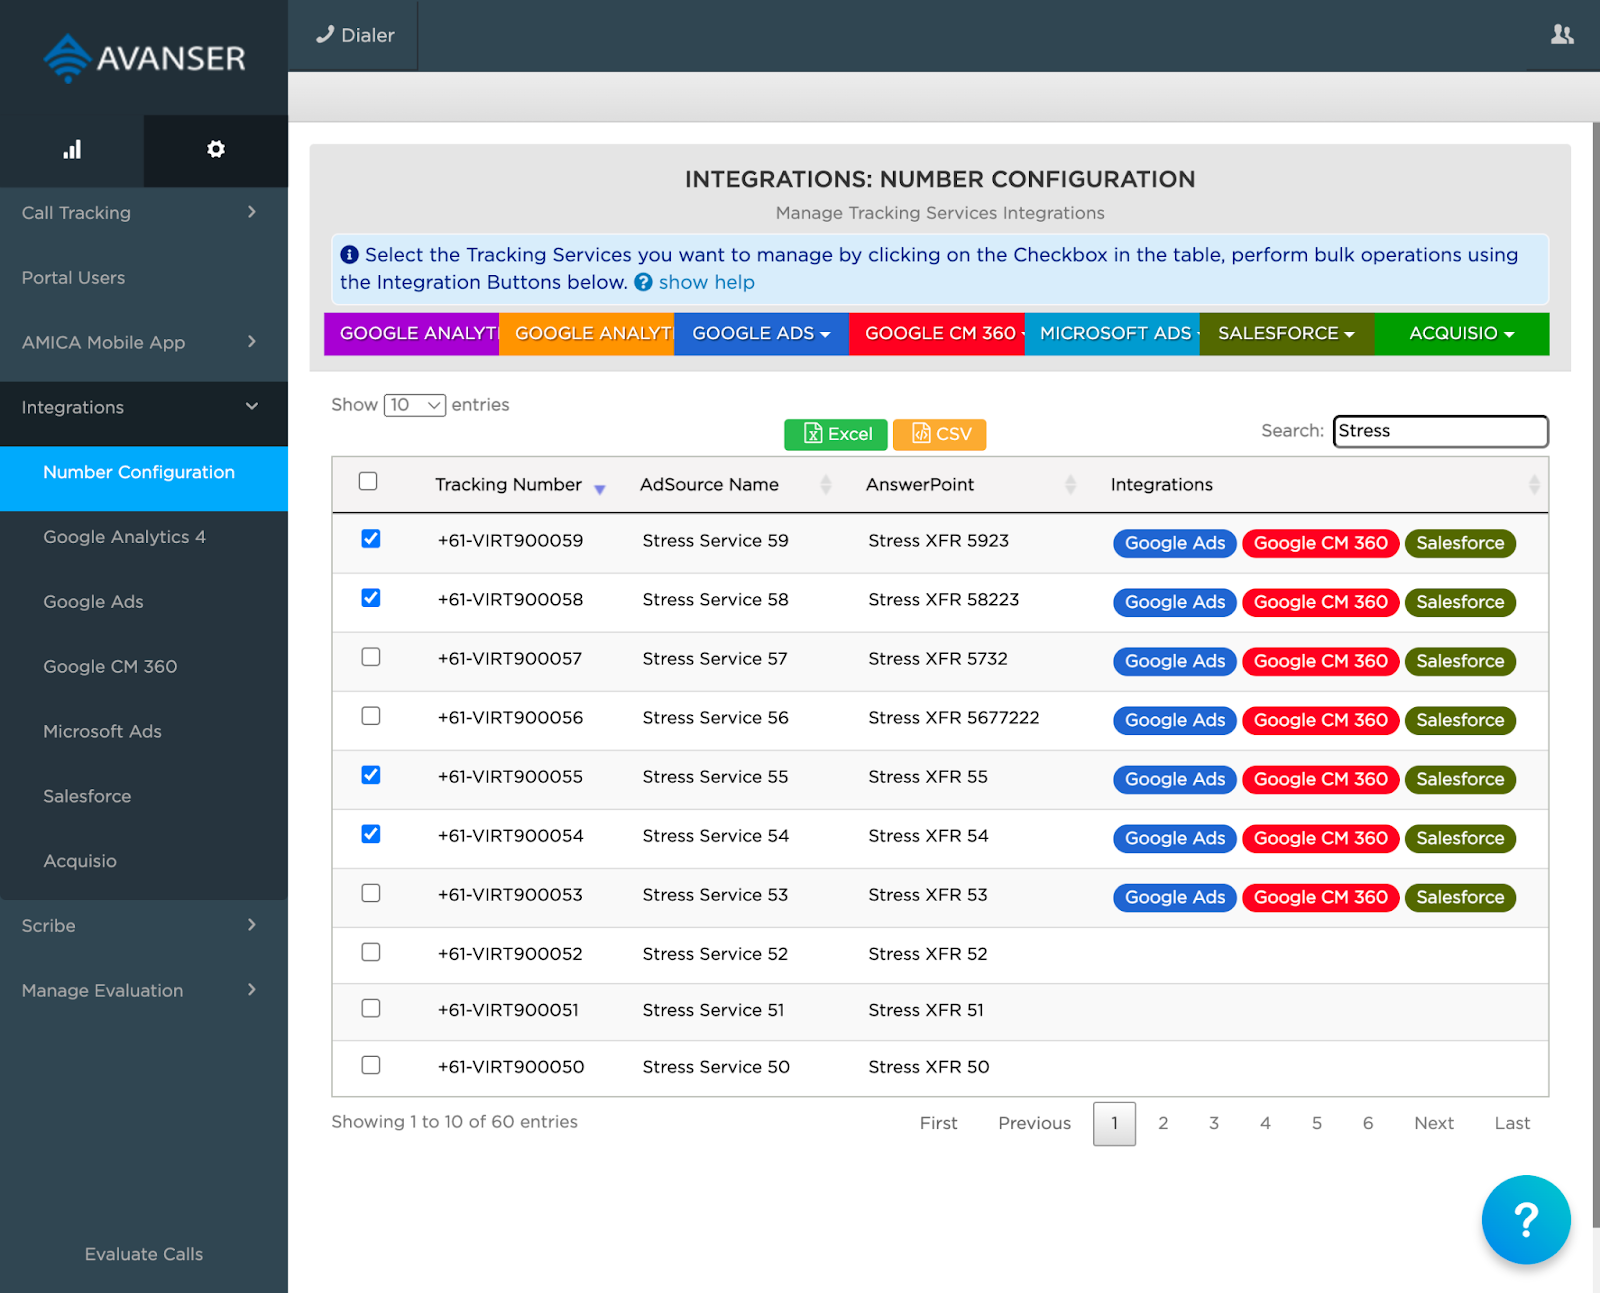

Other bulk operations you can perform include:
- Enabling and Disabling integration configurations.
- Deleting integration configurations.
2. Click on the desired integration button
All integrations are designed to offer a familiar interface and they all provide the same functionalities.
3. Click on the "Configure" menu option
Select the Account you want to use for the integration. We have chosen the account "default" in our example.
Chose whether you want to activate SMS push as well as push for the numbers.
Push SMS applies only to Tracking Number that supports SMS - Virtual Mobile Numbers only. SMS sent to the number will be pushed to Salesforce CRM.If none of the accounts listed is the one you need, you can create a new account by selecting "Create New Account" in the Account drop down.
Click the Update and Continue button to save the changes to the services. The integration is now configured.
You can make some test calls or wait for calls to land on your numbers. Call events will be sent to the reporting platform automatically.
Step 3: Verifying Your Integration Configurations
- In the Account Page
- Verify the Account is ACTIVE.
- Validate the Integration Account Options.
- In the Numbers Page
- Verify the Numbers are associated with the right account.
- Verify the Number configuration is ACTIVE.
- Perform test calls.
- In order to test integrations like Microsoft Ads, Google Ads, Google CM360 or Acquisio you need to click on a legitimate Ad to expect the data in the platform.
- Search for your Ad or refer to your Ad platform of choice on how to click through the add.
- When the Ad takes you to the Website, check the number and verify that the configuration and the number displayed match.
- Call the number displayed on the website.
- Check that events are received at least once on the 3rd Reporting Platform.
Salesforce App Cancellation
To cancell a subscription on AppExchange:
- Log in to AppExchange
- From the user profile menu, click My Installs & Subscriptions
- Find the subscription that you want to cancel
- From the dropdown list, select Manage Subscription
- Click End Subscription, and then confirm the cancellation
The cancellation takes effect at the end of the contract term.
Only user with "Manage Billing" permission can manage the app subscriptions.
Related Articles
Integrations: Number Configuration
Number configuration has to be configured in AVANSER Customer Portal. Each tracking number can be configured for various integrations including Universal Analytics, Google Analytics 4, Microsoft Ads. In order to access the Integrations, click on the ...Legacy Portal: Configuring Salesforce Integration
The AVANSER Salesforce app provides AVANSER’s call tracking functionality directly within Salesforce. Calls and SMS to an AVANSER tracking number will be created within Salesforce and linked to any related Leads, Accounts, Contacts or Users by the ...Integrations: Webhooks
Overview Webhook integrations allow call data to be push to other web servers, allowing integrations with any service that can accept data via a web request. Webhooks are used widely across CRM and data processing platforms, allowing the AVANSER call ...Integrations: Acquisio
This article will guide you through the configuration of Acquisio within AVANSER Customer Portal as well as steps within Acquisio configuration. Before jumping to the article, you can check our short video. Step 1: ACQUISIO - Enable external data ...Integrations: Google Ads
This article will guide you through the configuration of Google Ads. In order to use Google Ads reporting, you'll have to configure Google Ads Dashboard to collect the Conversions sent by AVANSER. Follow its dedicated Knowledge Base article available ...